Showing posts with label Color Mixing. Show all posts

Sunday, October 19, 2014

Fall Leaf Painting

Thank you for stopping by! 

We have been really enjoying our walks around the neighborhood lately. With all of the beautiful colored leaves and the perfect weather we have been having, it is such a wonderful time of year! Skyler will often talk about the colors he sees and the sounds he hears (stepping on crunchy leaves and listening to the leaves blow around are such great noises!), but then he will also say things like "The leaves change colors and fall off before the snow comes! And then the snow plow will come!!" in the most excited voice. It is adorable, but I am just happy to enjoy this beautiful fall weather before that season that shall not be named arrives!

During a recent walk we saw the most amazing red colored leaves, so we grabbed a bunch to take home and had a lot of fun with this simple painting activity. 

This post contains affiliate links for your convenience.

To start, I put a loop of tape on the bottom of the leaves and Skyler stuck them onto his paper. I loved how it looked like they were blowing around and he was so proud of setting this up on his own!


Next I squirted some yellow and red paint into a cup without mixing them, and let Skyler mix the paint as he went so we would have different shades of yellow, red, and orange with our leaves. I thought that Skyler would mostly paint on the leaves or on the white portions of paper, but I was happily surprised when he did big strokes from the insides of the leaves and out. He carefully filled up his paper and the resulting picture is so festive and fun!


When Skyler told me he was finished with his painting, we went through and carefully peeled off the leaves and tape and were left with some amazing resist leaves! The final product is even more beautiful that I thought it would be and I just love it! Such a festive painting that we will use to decorate for the season for many years to come!


This simple painting activity is a lot of fun, between the leaf collecting, deciding where to place the leaves, and watching the colors mix on the paper to resemble the leaves we see changing outside, we enjoyed this craft from start to finish!

I have been asked about Skyler's paint cup and smock, both of which we love and use ALL the time. His spill proof paint cup is from Melissa and Doug, and I got his Crayola art smock at Target in the craft aisle. I do not see it on their site anymore, but it is on Amazon!

Thursday, April 3, 2014

Easter Egg Color Sort

Minne-Mama is on Facebook! 'Like' us to stay updated on our fun crafts and activities! 
Thank you for stopping by!

I saw these craft sticks and randomly bought them at the same time I got the wooden rounds for our color sorter, Fish Eyes activity, and shape sorting play. I had planned on making a little fine motor game with a can, punching little holes in the plastic lid, like I have seen all over lately. I never ended up making one, but as I was getting some plastic eggs for our mirrored Easter egg painting, I saw the little holes and immediately thought of doing a fine motor color sort with the eggs and these sticks. 


Since we used the sticks as a color sorting activity, first we had to dye them. I ran painting them and coloring them with markers through my head, and then remembered a post I saw about water color and wooden blocks. I couldn't find the post I originally saw, but then when searching found this one from Fun and Home with Kids, and I just love her, so here was my inspiration.

I broke the sticks in half as they were too long to fit in the plastic eggs, we divided the craft sticks into plastic cups and Skyler added liquid water color with an eye dropper until we had pink, orange, yellow, green, blue, and purple. Since we only have primary colors, we have fun mixing colors until we got the right shade. Skyler loved swishing the cups around to cover the sticks with color.


The small holes already on the eggs were too small for the wooden sticks, I tried using a screw at first, but it was still too small. When looking around for something else that would make a big enough hole, my eyes landed on a set of chop sticks and they worked PERFECT! I had an egg crack when I pushed the chop stick in too quickly, so it has to be done pretty slowly.


Ready to go!! I was a little worried the red water color would not match well enough, but they did end up pink enough to distinguish from orange and match the pink egg.

Also, I put a little dot of hot glue under each egg, just so they wouldn't move around and to discourage the eggs being pulled out from the carton immediately.


At first, Skyler loved putting his hand into the bowl to just feel all of the wooden sticks. He told me what colors he saw, and then he started sorting after awhile. I was so proud of my little guy! This activity was perfect for him because he is so interested right now in colors and fine motor games like this. He was excited to see the eggs as well (and said, "paint?" a few times. Hoping for some more mirror painting!) Skyler did all of this sorting without prompting, but when he named what color he was sorting, I would repeat it to him.


After he had been sorting the sticks for awhile, I showed Skyler that they made a noise when you shake them, so he picked up the carton to shake it for awhile :)


This activity was so much fun! I loved being able to incorporate our seasonal Easter eggs with a color and fine motor activity to encourage these skills! We had all of the materials on hand already, so it was a great, simple activity for me to put together with/for Skyler.

It also makes a great busy bag activity, since the eggs are already stored in the carton, I just threw the sticks into a little baggie inside! This fine motor and color sort will get so much use in the next few weeks, as well as after the Easter holiday!


Thursday, March 27, 2014

Mirrored Easter Egg Painting

Minne-Mama is on Facebook! 'Like' us to stay updated on our fun crafts and activities! 
Thank you for stopping by! 

Oooh, this was a fun one!

Yesterday, we had a very busy morning with story time and errands, and Skyler ended up falling asleep in the car for about five minutes on the way home. I gave him some lunch and put him down right away for a nap...but for the first time ever he did not nap. I kept thinking, "oh, he laid down, maybe he will fall asleep," but nope, he would be right back up, doing laps around his crib. I knew it would be the perfect afternoon to whip out this painting activity.

I admitted on Facebook last night that I ended up taking around 500 pictures of this activity. Well, the entire activity. For this post, I narrowed it down from 245 to 28, and boy, was it hard! Skyler was so into this activity and I couldn't help but take picture after picture! Anyone else do this?!

For this simple Easter inspired painting activity, I cut some egg shapes out of white poster board and taped them onto a mirror that is in Skyler's room (he spent a lot of time in front of it as a baby!) I gathered some egg shaped painting tools including various colored plastic eggs and a cookie cutter.


When I got Skyler up from his non-nap I put some blue, red, yellow, and green paint into plastic cups and added white to each cup as well. Skyler helped me by stirring all of the colors, making our plain finger paints into beautiful spring pastel colors!


We did a little color match and put the pink, pale yellow, green, and blue eggs into the corresponding paint cup and it was time to create! Skyler immediately started by cracking an egg open and making some circle prints!


He quickly switched colors and tried painting with the entire egg.


And he was hooked! He moved from pink to yellow and then green quickly (as he typically will do - he has to try everything to figure out what is best)! For awhile he switched between the four paints, making prints with the eggs and cookie cutter and using the eggs to smear the paint around.


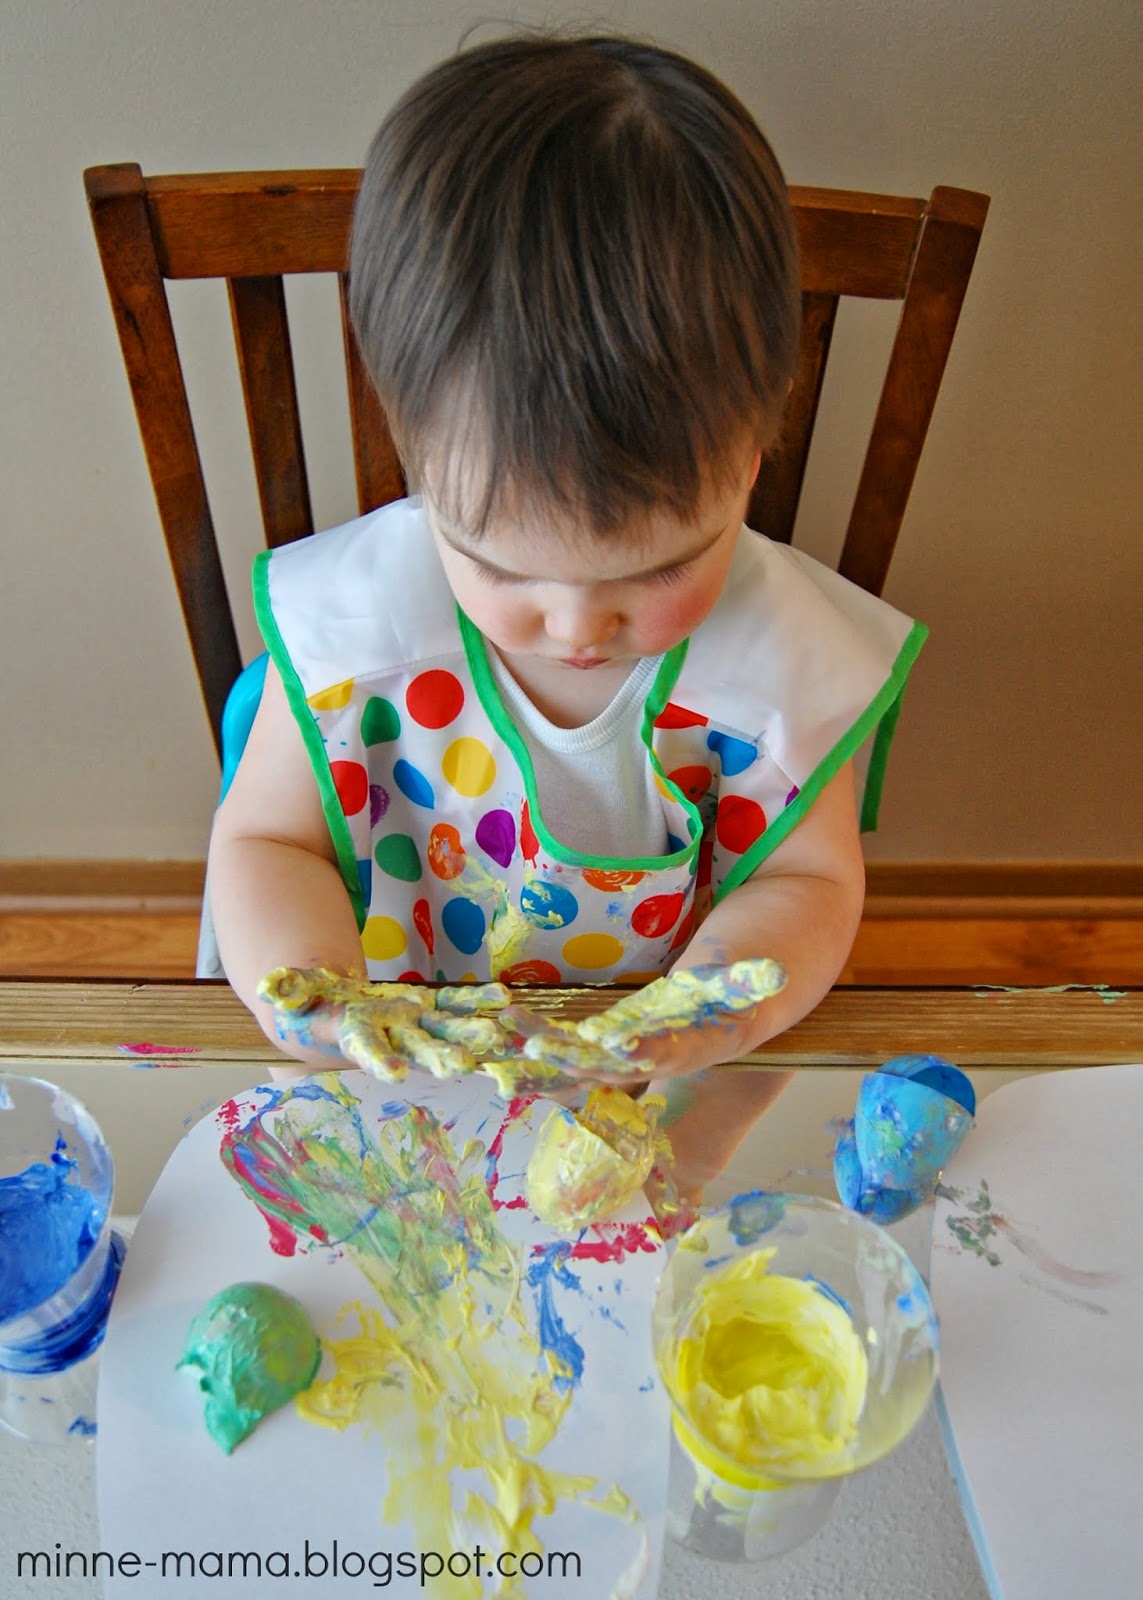
After awhile he noticed that his hands were covered with paint. At first it was a little bit of a shock, and then he thought it was funny. Once he saw his paint covered hands, he really got into it.


Skyler's favorite method was using the eggs to coat his hand in paint and then raising his arm above his head, throwing it forward and making hand prints all over the paper (and sometimes the mirror). It was so fun to watch him. He would add a little paint, make a bunch of prints quickly, check out his hand to see if he had enough paint, and then repeat the process!


He also liked to place his hand down and then smear the paint before lifting his hand up.


He ended up with a pink cheek and blue hair!!


A side smear :)


This is what Skyler did over and over. Paint, smack, smack, smack, repeat.


I have never seen Skyler get so involved with a "messy" activity. Even with the muddy track painting we did. He really loved that, painting the entire poster board, but he was more timid and seemed more uncomfortable when the paint ended up all over him. By the end of this mirror painting, his arms, face, hair, legs, and obviously hands, were completely coated and he thought it was great!


This painting activity was the perfect way to spend our afternoon. It kept my sleepy guy very entertained and we spent at least an hour painting, talking about the shapes of the eggs, the colors he was using, where the paint was on his body, and his methods of painting.

Skyler didn't care as much about the mirror part of the activity as I thought he would, but it was still nice - something different to try!


And in the end, we have these beautiful finished eggs. It is fun for me to look at them because I remember so vividly how each one was decorated. I see the egg he used the plastic eggs and cookie cutter for, the egg he made by slapping his hand down, the egg with the up smears, and then egg with the side smears. I also love how he used every color.


I never thought I would be so happy to have a day without Skyler napping ;)


The inspiration for this activity came from a mix of these two posts:
The Reflection Table by Teach Preschool
Painting the Night by Twodaloo

Tuesday, March 25, 2014

Flower Painting

Minne-Mama is on Facebook! 'Like' us to stay updated on our fun crafts and activities! 
Thank you for stopping by! 

We love to paint at our house. I am always trying to think of fun and exciting painting methods for Skyler to try. On the blog, we have painted with yarn, we made muddy tracks with animals and trucks, and we have used potatoes, carrots, and toilet paper rolls to make prints with paint. It is fun to give Skyler a new painting tool and watch his eyes light up and see how excited he is to create!

With winter behind us now (according to the calendar at least!) I have been looking for cheerful and springlike crafts and activities to brighten up our home. I was about to throw away some calla lilies that I bought around Valentine's Day, when I realized even though they don't look great anymore, I could give them a purpose before tossing them in the trash!


The coffee filter clovers that were acting as sun catchers on our bay window were fairly quickly discolored by the sun, and I have missed our Valentine sun catchers made with contact paper, so this seemed like a perfect spring sun catcher, using flowers as a tool to paint with!

I taped down a large piece of contact paper for Skyler to paint (on the non-stick side of the contact paper) and we mixed together some sparkly red and white paint to create our flower painting. 


Skyler had a lot of fun using the flowers as a painting tool. Of course, he had to try out all four flowers and he spent time using both the head and stem of the flowers to paint. Skyler kept asking for "more paint peeeeas!!" and filled the entire piece of paper with different shades of pink!


My favorite spot on Skyler's painting - a perfect calla lily print!

I had planned on taking off the paper and placing the sticky side of the contact straight onto our window, but I decided to make a special set of frames to display his beautiful art! I thought it would be fun to make some big calla lily sun catchers for our window, a fun way to show off the painting he made with the same type of flower!


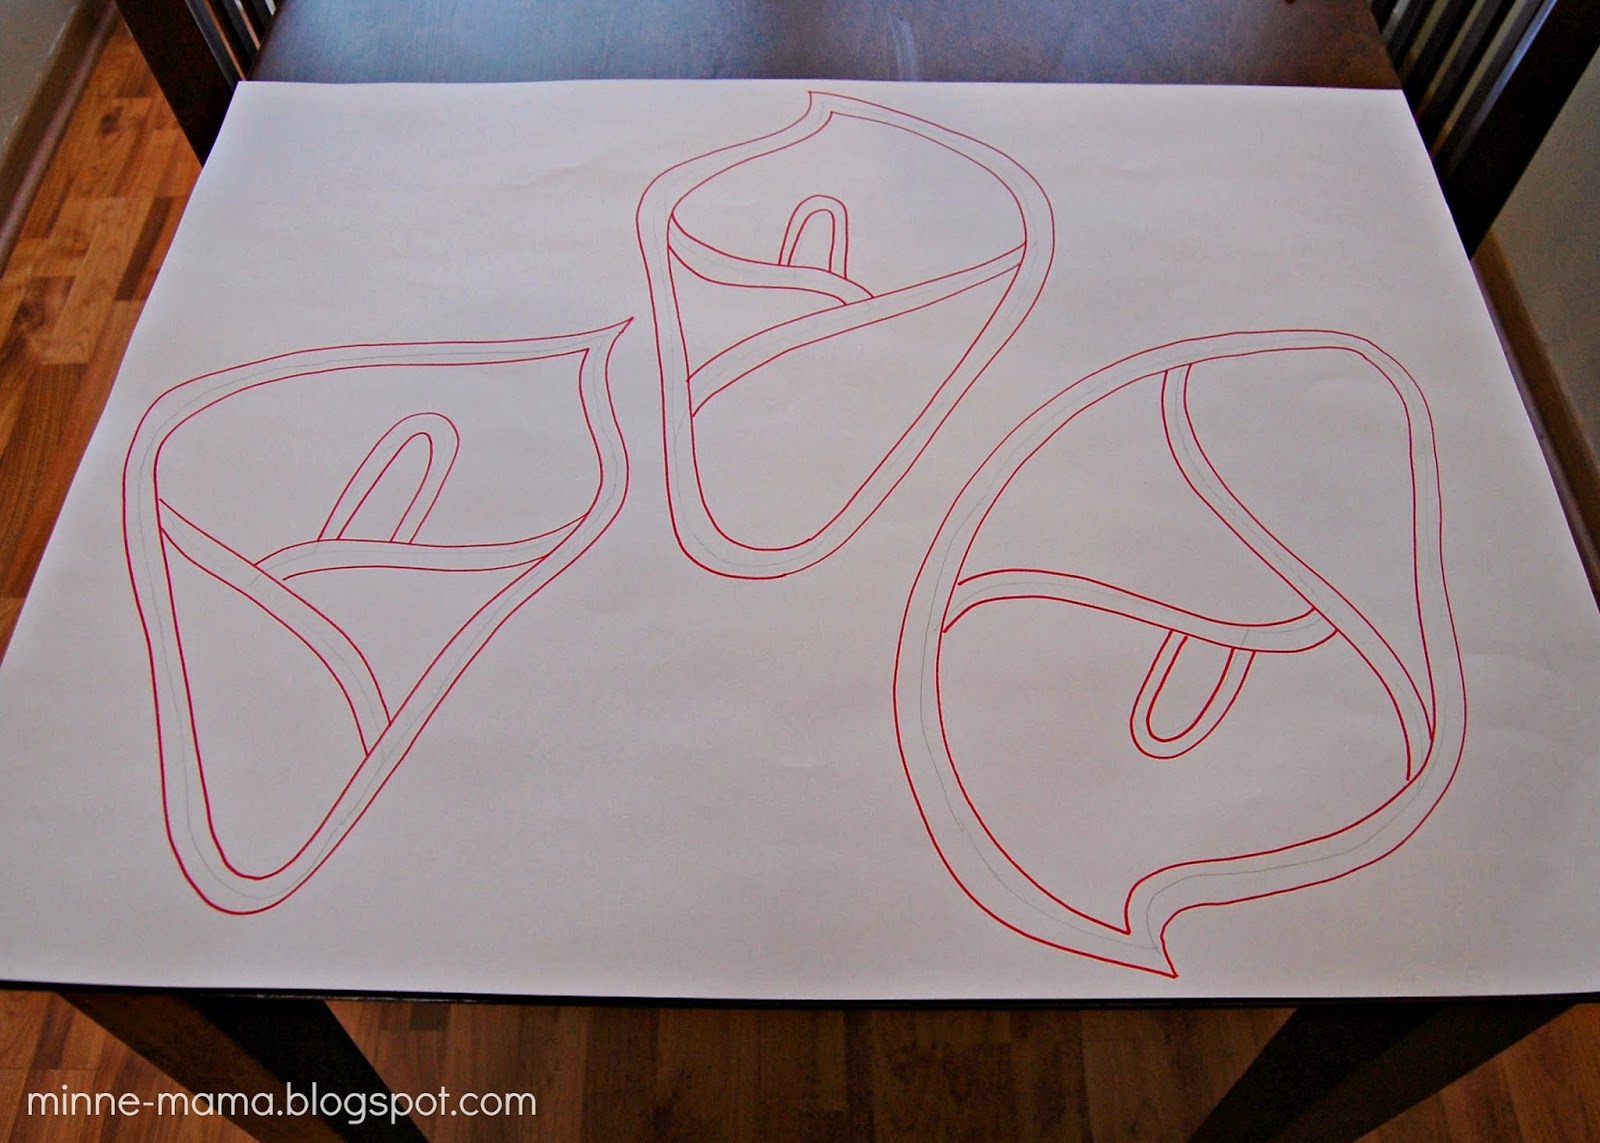
I searched for a calla lily outline, and this free clip art caught my eye! Using a marker on the removable part of the contact paper, I (very) loosely drew calla lily shapes like in the picture above, trying to make sure that I was getting most of his painted parts into the flower shapes!


After cutting them out, I traced each flower shape onto a piece of poster board. I could not get a good picture of just the pencil, but after making one line with pencil, I made a thick line on either side, so some of the frame would go outside of the contact paper when I glued them together. These are the outlines for the frames, you can see the pencil line between each group of red lines.


I painted our frames with the same sparkly red paint that Skyler did his flower painting with. When they were dry, I cut along the red marker lines and then glued the frames onto the contact paper (the same non-stick side that Skyler painted on).


Before they were glued together, but this is what they looked like before going on the window.

I made sure the glue had completely dried before trying to peel off the paper. I didn't want there to be any separation if the glue was even a little bit wet still!


I love how contact paper makes the perfect sun catcher when painted. It took a bit more time to frame his artwork (it didn't take much time though!), but I think it is fun how the flower frames show off what tool Skyler used to make his painting. I made sure the calla lily print stayed whole (on the top of the middle flower!)

To finish our spring sun catcher I added stems with green tape. I tried using decorative masking tape (the same one I used for our musical percussion tubes), but I didn't love it, so in the end I used Green FrogTape! It made a more substantial stem and was not quite as see through.

 The masking tape on the left just wasn't enough, but I love the look of the painting tape!

Isn't it so springy with the snow falling in the background? ;) We had a cold and cloudy day, so it is hard to see how beautiful Skyler's painted sun catcher is! The sparkly paint shimmers and lights up with the tiniest amount of sun - I love these flowers! Also, while I am a big fan of our home, town house living does not supply the best views, so the window covering is lovely to look at!


This was a fun craft for both of us! Skyler had a great time with his exciting new painting tool and I am happy that I was able to frame the painting in a way that showcases his beautiful creation!